
Why take this course
In this course, Oliver Thomas teaches you how to streamline the workflow from design to production using Rhino.Inside. Oliver is a veteran BIM computational design specialist working at BIG. He is in a unique position where he works with multiple teams to implement BIM strategies and workflows using the latest computational design tools. After testing Rhino Inside at BIG and being impressed with the potential it offers, it was quickly rolled out as a core strategy for future projects. Start learning Rhino.Inside today, upgrade your skills and learn from the best!
Learn why Rhino.Inside is a game-changer for interoperability
Rhino.Inside makes the transfer of information between Rhinoceros 3D and Autodesk Revit quick, easy and intuitive, it is a real game-changer. It is an open-source project which allows you to run Rhino and Grasshopper within other programs such as Revit. It takes literally a push of a button to get your geometry into Revit from Rhino and vice versa. The power of Rhino.Inside is its simplicity, it doesn’t take a computational design expert to master it.
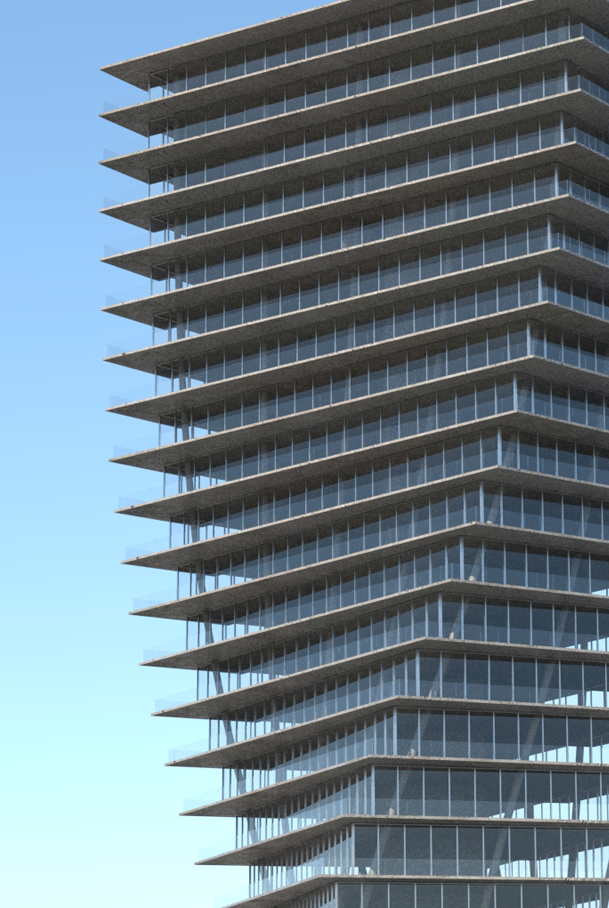
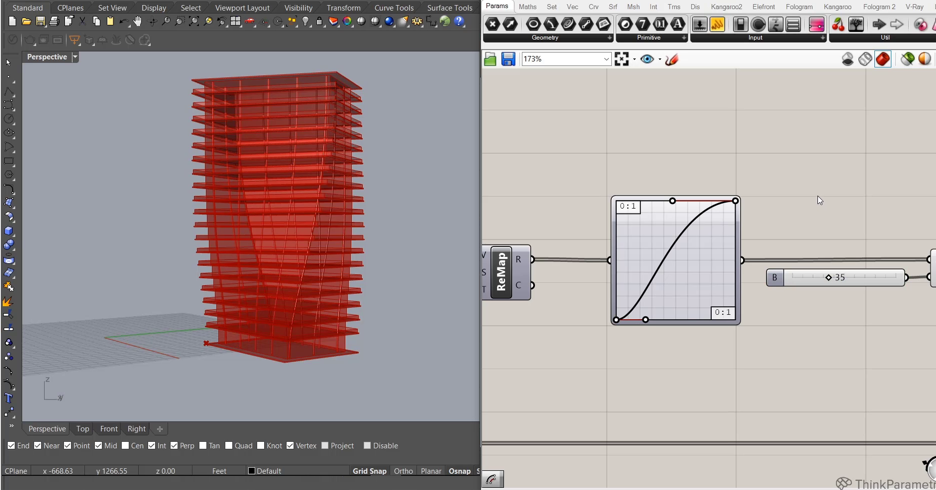
The Grove at Grand Bay as case study
This project is a great example where computational design tools such as Rhino.Inside are very beneficial to quickly move information between Revit and Rhino. You start in Rhino and Grasshopper and set up a definition to parametrically control the shape and size of the towers. You’ll learn what parts of the project are useful to parametrically control and what parts are better left to model by hand.
Interoperability workflow used by BIG
In the first lessons, Oliver explains the workflows and strategies used by BIG to set up a project. After explaining the requirements and install procedures, he explains the interface and some basic functions to get you started modeling geometry directly in Revit through Grasshopper and Rhino.Inside.
Transfer information from Rhino to Revit
When the basic shapes are modeled you move to Revit. In Revit, you continue with transferring all the geometry using Rhino.Inside to native Revit geometry like floors and walls. You also complement the imported geometry by modeling extra walls and learn the strengths and weaknesses of explicit and parametric modeling.
Geometry back to Rhino from Revit
Sometimes for visualization purposes, Revit models have to be transferred back into Rhino. With just a few steps, very detailed building elements, like curtain walls, are seamlessly transferred back into Rhino with a click of a button. This reduces the time modeling details in Rhino and your focus can be on getting the render settings just right.
1.- Introduction
07min 25seg2.- Install and setup
04min 43seg3.- The Rhino.Inside interface
07min 54seg4.- Rhino Inside components and workflows explained
28min 57seg5.- Deconstructing the logic of The Grove towers
06min 03seg6.- Creating the massing in Rhino 3D and Grasshopper
19min 51seg7.- Creating the building elements in Rhino 3D and Grasshopper
16min 14seg8.- Using Rhino.Inside to transfer information from Rhino to Revit
26min 05seg9.- Sending geometry back to Rhino from Revit using Rhino.Inside
19min 16seg